Hosting Reclaimed
Tue, Jan 19, 2016Here’s another technical post for y’all!
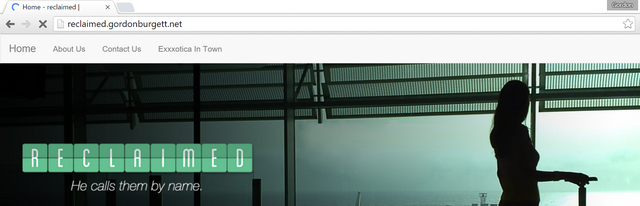
I had some time this past weekend, so I took a look into the website I made a year ago for Reclaimed. The old version was made with Locomotive CMS, and hosted on Locomotive hosting. It was a good choice at the time, because we needed something fast. We wanted to deploy it before the 2015 super bowl.
I’d previously looked into moving it to Wordpress or Drupal, but that would basically require redoing the whole site. More work than I’m willing to put in. But, just this past weekend, Locomotive v3 came out. I decided to try hosting it myself, because $20/mo is just a bit too much to be paying for a simple website like this. Plus, it would be fun! (or so I thought.)
Follow along in another tab with my repo: https://github.com/gburgett/locomotive_engine
First things first, I’ve learned from past mistakes, anytime you’re installing open source software make sure you do it in a Linux VM. Too often open source stuff, especially ruby (oh how I loathe you now), only works on OSX and Linux.
The second thing I’ve learned from past mistakes is always have a repeatable build of your environment. My go-to nowadays is Vagrant and Docker. So I hacked a simple Vagrantfile and provisioning script which just sets up docker and docker-compose. vagrant up!
OK now we can get started!
So now that I have a linux system, I need to start building the environment that hosts the LocomotiveCMS engine. Following along from this guide, I built my environment from the rails:4 base. I created the rails app and installed the ’locomotivecms’ ruby gem, then set the command to run the server:
FROM rails:4
MAINTAINER gordon.burgett@gmail.com

# create the rails app, add locomotivecms as a dependency, install all the gems
RUN rails new engine --skip-bundle --skip-active-record
WORKDIR engine/

RUN bundle inject 'locomotivecms' '~> 3.0.0'

RUN bundle install && \
	 bundle exec rails generate locomotive:install && \
	 bundle install

EXPOSE 8080

CMD bundle exec rails server -p 8080
Using docker-compose, I connected my engine image to mongoDB:
engine:
  build: engine/
  ports:
   - "8080:8080"
  links:
   - db
db:
  image: mongo:3
docker-compose up and… can’t connect. But I can connect if I get into the docker image. It must be running in development mode and only accepting connections to localhost. Time for some research!
Several hours of googling later…
Apparently the standard way to set up a rails app is to use nginx in front, and proxy through a unix socket. So, time to set all that up! This was a pain. First, even installing nginx required a non-trivial script which I found somewhere:
#! /bin/bash

nginx=stable # use nginx=development for latest development version
echo "deb http://ppa.launchpad.net/nginx/$nginx/ubuntu lucid main" > /etc/apt/sources.list.d/nginx-$nginx-lucid.list
apt-key adv --keyserver keyserver.ubuntu.com --recv-keys C300EE8C
apt-get update -y
apt-get install -y nginx
And there’s a lot of conflicting info on how to set up your nginx configuration to proxy. For the most part, I just needed to set up the “upstream” section, define it later as a location, and proxy to it. I decided I’d have it first look for static assets in the ./public folder, hence the try_files directive. Here it is:
http {
  # tell nginx where to find the ruby engine
  upstream engine {
    server unix:///var/run/puma.sock fail_timeout=0;
  }

  server {
    listen 8080;
    server_name engine;

    # serve out of the public directory
    root /engine/public;

    # try in order: {uri}/index.html, static assets, proxy to engine
    try_files $uri/index.html $uri @engine;

    # define settings used for proxying
    location @engine {
      proxy_set_header Host $host;
      proxy_set_header X-Forwarded-For $proxy_add_x_forwarded_for;

      proxy_pass http://engine; #refs the upstream defined above
    }

    # 500 level error pages
    error_page 500 502 503 504 /500.html;
  }
}
I also had to tell the ruby server to listen on that unix socket, so I added the puma.rb config file. The crucial line:
bind 'unix:///var/run/puma.sock' # nginx will proxy to this socket
Since we now have 2 processes in this container, I need supervisord to coordinate them. My supervisord.conf is mostly pulled from some examples I found (you can see the full thing in the repo), here’s the critical stuff:
[supervisord]
nodaemon=true

[program:rails]
command=puma -C ./config/puma.rb config.ru
directory=/engine/
...

[program:nginx]
command = /usr/sbin/nginx
...
And of course nginx can’t run as a daemon anymore so you have to add daemon off; at the top of nginx.conf.
So that all has to get back into the Dockerfile. Here’s the lines:
# we need nginx
COPY install_nginx.sh install_nginx.sh
RUN /bin/bash install_nginx.sh && rm install_nginx.sh
# and supervisor
RUN apt-get install -y supervisor
...

# copy all the config files into the image
COPY supervisord.conf /etc/supervisor/conf.d/supervisord.conf
COPY nginx.conf /etc/nginx/nginx.conf
COPY config config

# start by running supervisord
CMD ["/usr/bin/supervisord"]
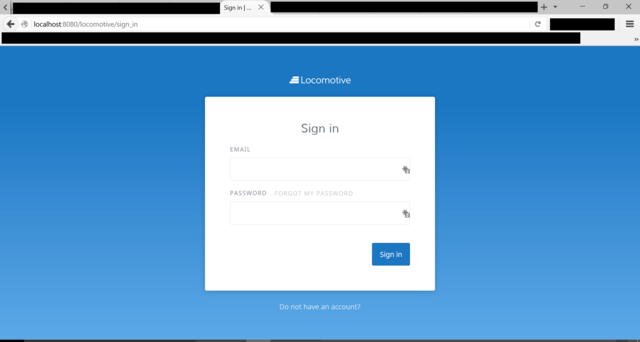
Annndd… minor success! I can access the page from outside!
Fixing the assets
I was getting the HTML, but all the javascripts, css, and images were not loading. The browser was being redirected to the sign-in page when it tried to load them. Hmm… is nginx supposed to be serving these?
Several more (ok, maybe 1 and a half) hours of googling later, and apparently you’re supposed to precompile assets in the rails asset pipeline. So, let’s add that to the docker image:
# precompile all the assets so nginx can serve them
RUN RAILS_ENV=production SECRET_KEY_BASE='foo' bin/rake assets:precompile
And now… the assets are serving but the browser isn’t displaying them. For some reason, they’re all being served as MIME type text/plain? I thought nginx understood javascript and css files ought to be served as the correct MIME types?
More googling came up with this missing piece: nginx has a special file that has to be included in it’s configuration to tell it about MIME types.
# include this so that nginx doesn't serve everything as text/plain
include /etc/nginx/mime.types;
Include that, rebuild, and SUCCESS! I’m seeing it the way it should be!
Now to put it on the server
Since I have a dockerfile, it’s fairly trivial to set up a repo on dockerhub. I even set up an automatic build to trigger whenever I push to github. Now I can set up my AWS server to run it.
I changed up the HAProxy configuration on my AWS server to redirect incoming requests for reclaimed.gordonburgett.net to port 8180. I had previously set up my EC2 instance to connect to the “default” cluster in ECS, so I just needed to configure ECS to fire up my docker containers.
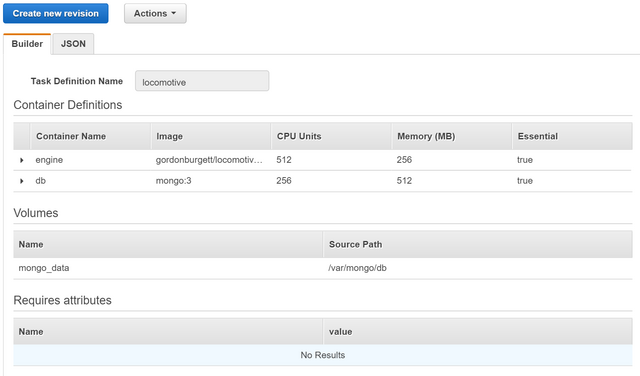
One thing to make sure of is that the total memory allocations don’t top the available memory of the system, or else ECS won’t be able to place the containers. So unfortunately Locomotive gets a rather low allocation, only 256MB.
I also had to remember to link the engine container to the DB container so they can talk, and to mount the mongodb data directory onto the disk so it won’t be destroyed whenever I redeploy the system.
I’ve put my secret keys in environment variables (which is why I won’t show you the whole configuration). But you’ve seen the core parts in the above screenshot.
Last thing to do is define a service with that task and wait for it to spin up!
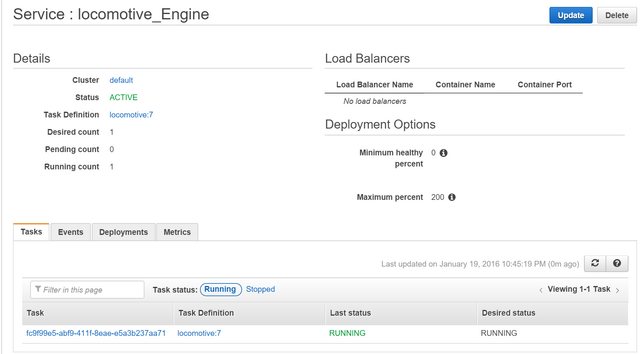
Since I have HAProxy running on my EC2 instance, I don’t need to pay $15/mo for a load balancer. I just mounted port 8180 in the task definition, and HAProxy sends traffic to that port.
And it worked! I created an account on the locomotive engine & set about uploading my site. That was a bit more of a pain than I thought.
Uploading the site
I needed to be able to run the upload tool, Wagon. Some time ago I had tried installing it on my windows machine and that was a huge pain. So again we go to Vagrant!
Vagrant.require_version ">= 1.3.5"

Vagrant.configure(2) do |config|
  config.vm.provider "virtualbox" do |v|
  	v.memory = 2048
    v.customize ["setextradata", :id, "VBoxInternal2/SharedFoldersEnableSymlinksCreate//vagrant", "1"]
  end

  config.vm.box = "ubuntu/vivid64"

  config.vm.network "forwarded_port", guest: 3333, host: 3333
  config.vm.network "forwarded_port", guest: 35729, host: 35729

  config.vm.provision "file", source: "~/.gitconfig", destination: "~/.gitconfig"
  config.vm.provision "shell", path: "./provision.sh"
end
#!/bin/bash
# provision.sh

#install ruby
curl -o rubystack-2.3.0-0-dev.run https://downloads.bitnami.com/files/stacks/rubystack/2.3.0-0/bitnami-rubystack-2.3.0-0-dev-linux-x64-installer.run
chmod +x rubystack-2.3.0-0-dev.run
./rubystack-2.3.0-0-dev.run --mode unattended --disable-components varnish,phpmyadmin,rvm

#install ruby dev headers
apt-get install -y g++ ruby-dev zlib1g-dev

#install wagon
gem install locomotivecms_wagon
The difficult part here was installing Ruby. They do not like to make it easy. I am downloading Bitnami’s Ruby Stack & running that, then installing wagon using the “gem” tool.
I kept getting an error when installing wagon, because it was trying to build some native extensions. That was really frustrating, it took me several hours to figure out (fortunately I could work parallel with the above efforts). The critical line was installing ruby-dev, g++ and zlib1g-dev. After installing all those it would finally compile and install wagon.
The wagon docs aren’t that great, they assume a certain knowledge of ruby. Well I’ve certainly gained enough of that over this experience. I managed to push to my server using this command:
wagon auth <my-email>@gmail.com <my-password> http://reclaimed.gordonburgett.net

wagon deploy reclaimed.gordonburgett.net
It still prompted me for several questions, including my password again, and I’m not entirely sure where all that config data is stored. But it worked!
Time to celebrate!
I’m glad it worked. We maybe won’t want to shift over to this setup, but at least I learned a lot about rails. It was a fun excercise.